The History of Photography
900 AD
Alhazen was born in 965 AD and was considered 'The world's first true scientist'. This was due to the fact that he was rigorous in his testing methods and recorded his data thoroughly. he was the inventor of the Camera Obscura, which involved light flooding through a pinhole to project an image. he also was the first person to explain to people that vision occurs in the brain and not the eye.
1502
Leonardo Da Vinci was very interested in the idea of the camera obscura he wrote a book in 1502 which was the first ever clear description of the camera obscura. he made many notes on how the camera obscura is very similar to the human eye, and how the image is inverted and then reverted. Multiple obscuras were constructed during the renaissance to further explore this newly found information.
1717
Johann Heinrich Schulze was famous for discovering that a mix of chalk, nitric acid and silver would capture shadows momentarily. shaking the captured images would destroy them, as would any exposure to light. He was technically to be considered to be the creator of photography.
1825
Joseph Nicephore Niepce invented heliography, this would allow the image to survive for the longest time. the image would be printed on a photoengraved printing plate. also, in 1826 or 1827 he used the first primitive camera to produce the oldest surviving photograph of a real world scene.
1833
A man called Louis Daguerre became interested on light sensitive materials after the death of Niepce in 1833. For the process which was eventually named the daguerreotype, he exposed a thin silver-plated copper sheet to the vapour given off by iodine crystals, producing a coating of light-sensitive silver iodide on the surface. this process produced an image that was to later be chemically developed into a visible image. Daguerreotypes were usually portraits.
1841
An Englishman named Henry Fox Talbot announced the calotype process in 1841, a developing process that involved the use of a different silver salt, and a new developing agent which brings out a slight image onto the exposed paper. this allowed for there to be a negative on which multiple images can be printed onto.
1887
Richard Leach Maddox, a British photographer and physician, discovered dry gelatin photographic emulsion. dry plates had never been tested or used before. these dry plates allowed photographers to be able to grab a dry plate and see the image, rather than having to access a dark room and develop the photo. however, this method could only produce black and white images. These plates also allowed a shorter exposure, leading to fast photography.
1878
Eadweard Muybridge was another British photographer. In 1882, the former governor of California, Leland Stanford, a businessman and race-horse owner, hired Muybridge for a portfolio depicting his mansion and other possessions, including his racehorse Occident. after many attempts, in 1878, Muybridge was able to capture a galloping horse with twelve cameras all electronically linked. This was a huge breakthrough in photography, and people also learned that all four of the horses legs came of the floor at once whilst galloping. These 12 images were named 'Horse In Motion'.
1884
An American named George Eastman patented the first ever film in roll form to prove practical, this allowed photographers to do most things with just the camera. And then in 1888, he invented the first Kodak camera, which used his newly found film. he invented the motto 'you press the button, we do the rest' which became popular among customers. Coloured film was also introduced later down the line. Soon, the company Kodak became the biggest camera brand at the time.
1924
A German man named Oskar Barnack had invented the Leica camera and used his prototype to take photos wherever he went. the Leica was the first ever commercially available and practical 35mm still-camera.
1975
Steven Sasson invented the first self-contained digital camera at Eastman Kodak in 1975. This camera only took images in black and white, and only had a resolution of 100 X 100. This was not the first ever digital camera, it was the first ever hand held digital camera. This became very convenient for photographers who wanted to take quick images.
Camera Obscura
|
The Camera obscura was invented in the 11th century by a scientist named Alhazen. He figured out that by creating a pinhole in a dark box or room he could project images onto the walls. It's name has a latin meaning, 'Dark chamber'. The camera obscura works in a similar way to the human eye, it perceives the image shown as upside down. Artists, such as Leonardo Da Vinci, took advantage of this invention and used it to draw their surroundings, the drawings would be accurate as they would use the camera obscura to trace them. Eventually, these became more portable, even leading to a pocket sized camera obscura.

|

|
How to make a camera obscura:
- First, fold your length of black card in half, unfold it and then fold each side into the middle and form into a box, then tape the edges together.
- Then, get your tracing paper and cut to fit the top of the box. Tape it to the top of the box making sure that it is light-tight.
- Now get your piece of black sugar paper and cut like the tracing paper. Then draw an X from corner to corner. After this, create a square 2cm apart in every direction to the center of the middle of the X, this is the aperture. Now tape the black sugar paper with aperture to the other end of the box, making sure that it is still light-tight.
- You should now be able to see an inverted and out of focus image on the back of the tracing paper. Now form a piece of black card into a lens, and tape a magnifying glass to the end of it. This will focus the image. Now tape the lens to the aperture.
- The camera obscura is now complete, you should be able to see a focused inverted image on the back of the tracing paper.
Shutter Speed

|
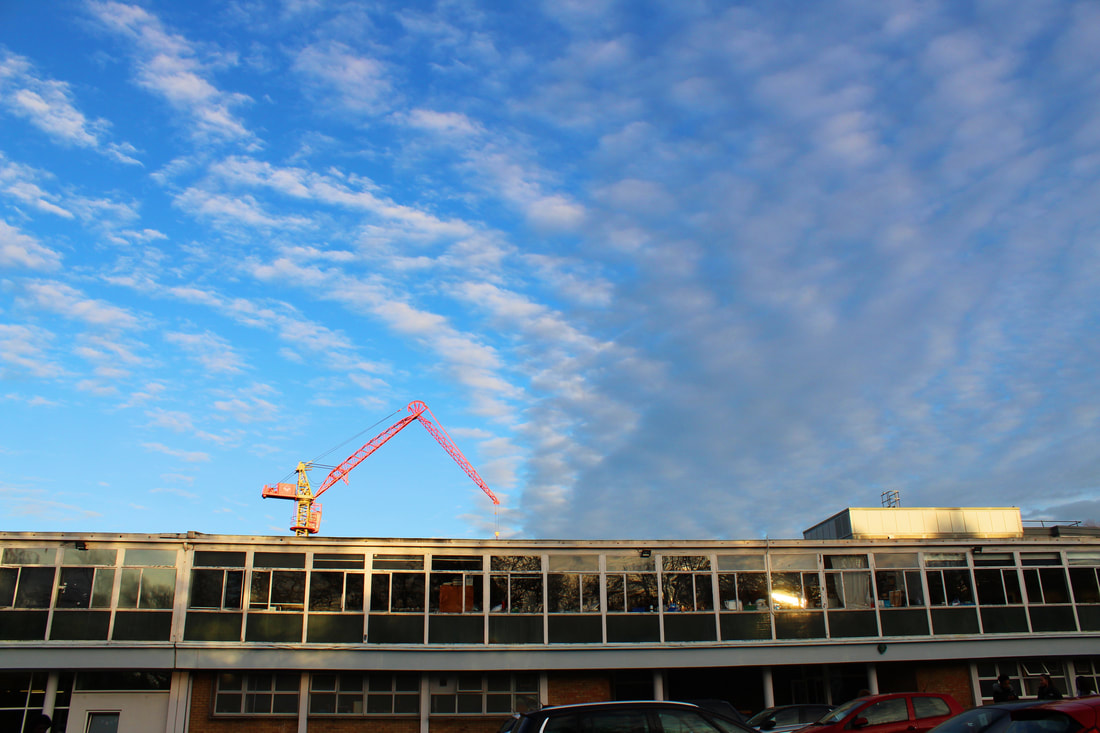
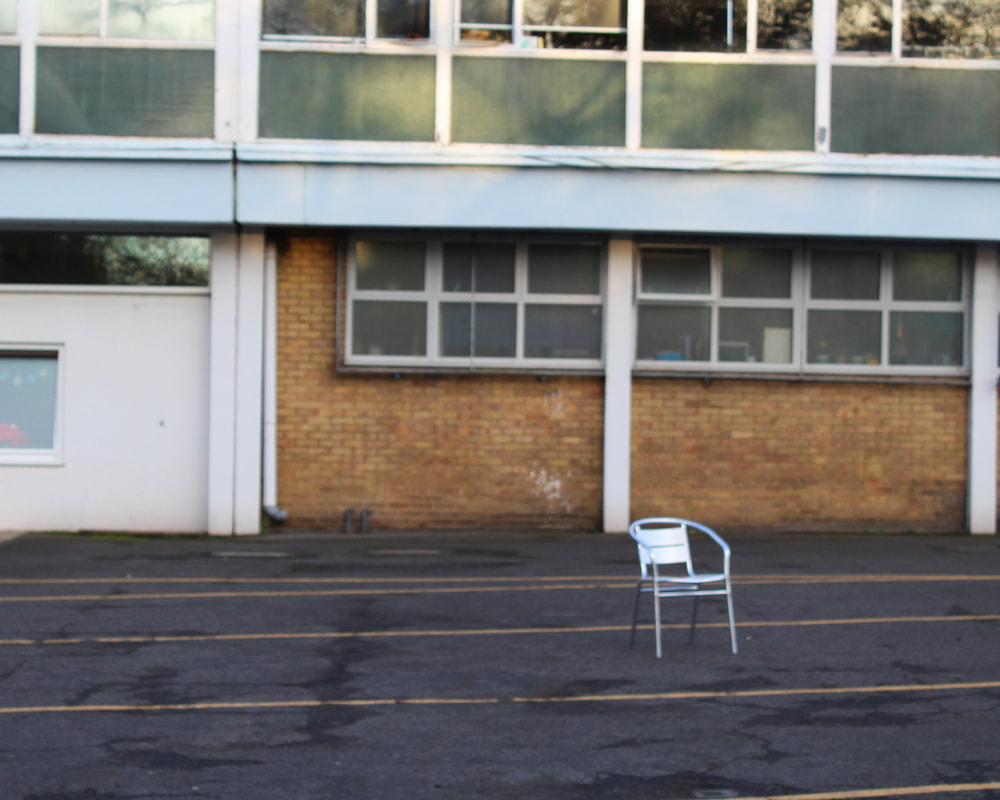
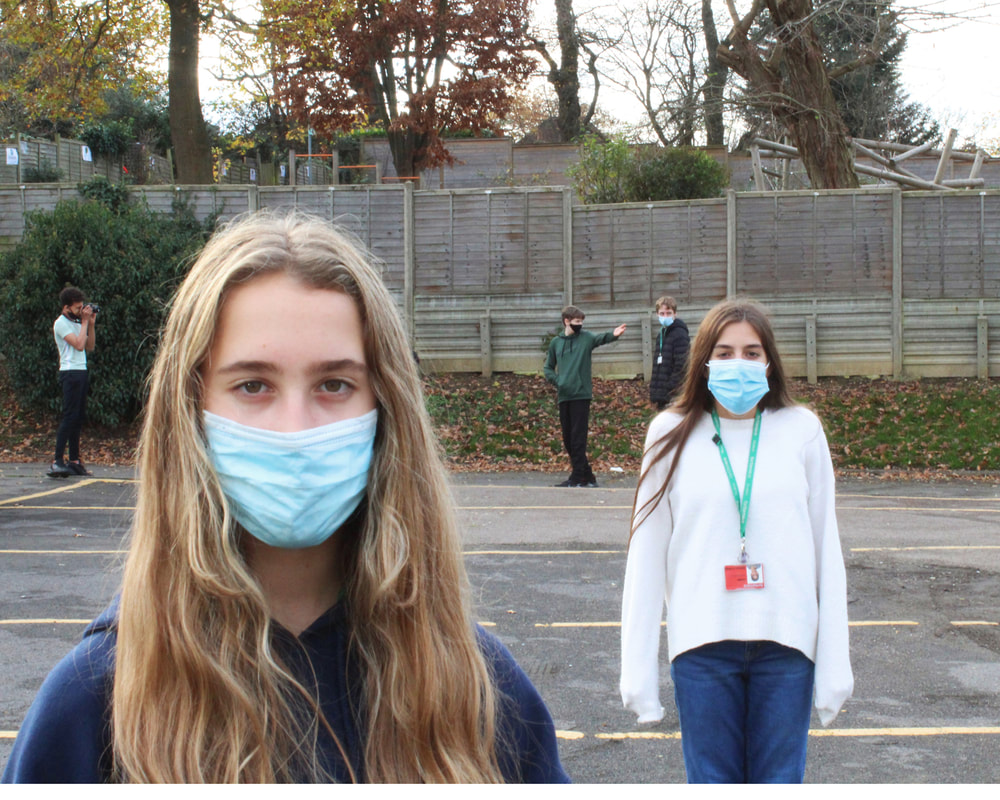
Shutter speed is the length of exposure the camera is given. A fast shutter speed might be underexposed due to the shutter not letting in much light, this leads to a darker image meaning that ISO or aperture needs to be adjusted. It also produces a clear and sharper image that is used to capture movement. Shorter exposure also means that less light is let in. A slower shutter speed may be overexposed due to the shutter being left open for a longer time, leading to a blurred image. Shutter speed is measured in seconds or fractions of seconds.
The photo shown on the left was taken with a shutter speed of 1". This creates a blurred and 'ghost like effect'. Because of accidental camera shake the background is blurred, so it does not contrast with the subject. The photo shown above was taken with a shutter speed of 1/200. This captured the movement and displays a much clearer image. |
DSLR Camera

|

|
|
1 - Shutter Button
This button releases the shutter, half pressing with auto focus, and pressing fully will release the shutter, taking a photo. 2 - Red Light Reduction Lamp This will reduce the red eye effect when using flash. If this is enabled, half pressing will activate the lamp. 3 - Lens Mount This is the point of contact where the lens and camera body meet. you can change out the lenses for different situations. 4 - Lens Mount Index To attach the lens to the mount, align the red dot (for EF lenses) or thew white mark (for EF-S lenses) you then turn clockwise until you hear a click. 5 - Lens release Button Pressing this and turning the lens anti-clockwise will release the lens. 6 - Mirror This mirror is unique to only DSLR cameras, it reflects light from the lens into the viewfinder allowing you to see images in real time. The mirror flips up immediately before shutter release. 7 - Microphone This is a built in microphone for capturing audio during a recording. The microphone can be either monaural or stereo depending on the camera. 8 - Built In Flash When required, the flash an be used to take photos in dimly lit environments, you can set it to be automatically fired. |
1 - Focus Mode Switch
Toggles AF and MF 2 - Speaker Where the audio of a played back movie is put through. Turing the main dial will adjust the volume. you can also select to play the background music from the menu screen. 3 - Strap Mount A mount for a strap. 4 - Hot Shoe The terminal for an external flash units. data is transmitted through the metal contacts, so these contacts should be kept clean and intact. 5 - Power switch Toggles the on/off for the camera, and it will automatically switch off after a while. 6 - Mode Dial Turning this will select a shooting mode according to the scene to be captured. It is divided into the Creative zone and the Basic zone. The Creative zone allows users to manually select functions. The Basic zone will automatically select settings depending on the scene. 7 - Flash Button Use this to enable the built in flash. In some cases the flash will pop up automatically. 8 - Main Dial Multi purpose dial that has many functions, such as value of shooting settings, aperture/shutter speed/ expose compensation, and jumping through playback images. 9 - Zoom Ring Turning this will alter the focal length, the selected length can be identified from the markings on the lens. 10 - Focus Ring When the camera is in MF this ring will adjust the focus. |
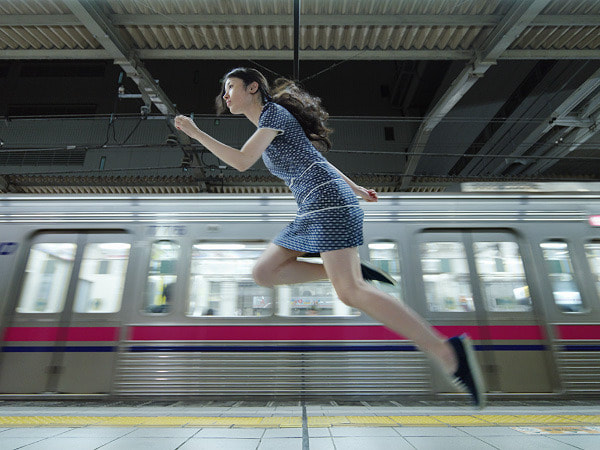
Natsumi Hayashi
Hayashi is a Japanese photographer who is known for taking 'levitating' photos. these photos are a part of her 'levitating' series, a collection of photo that displays a person who appears to be floating. I like how Hayashi uses colourful and contrasting backgrounds, and how she manages to capture the flowing movement in a still image. I think that this artist has made this work to prove how shutter speed can be utilised to create a different 'style' of photos. What I like is that the people around the floating subject are acting normally, so only the subject is levitating. This gives a greater emphasis in what the photographer wants you to see. This photo was made using a very fast shutter speed, this will capture the movement of the subject jumping. This is what creates the levitating effect. Hayashi's work links to our project of exploring shutter speed and how it can effect the photograph taken. It relates to the work I've done as we have also been taking photo with a fast shutter speed.
Sat.06.25.2011

Sun.06.26.2011
|

Fri.06.17.2011

Thu.06.30.2011
|
Levitation
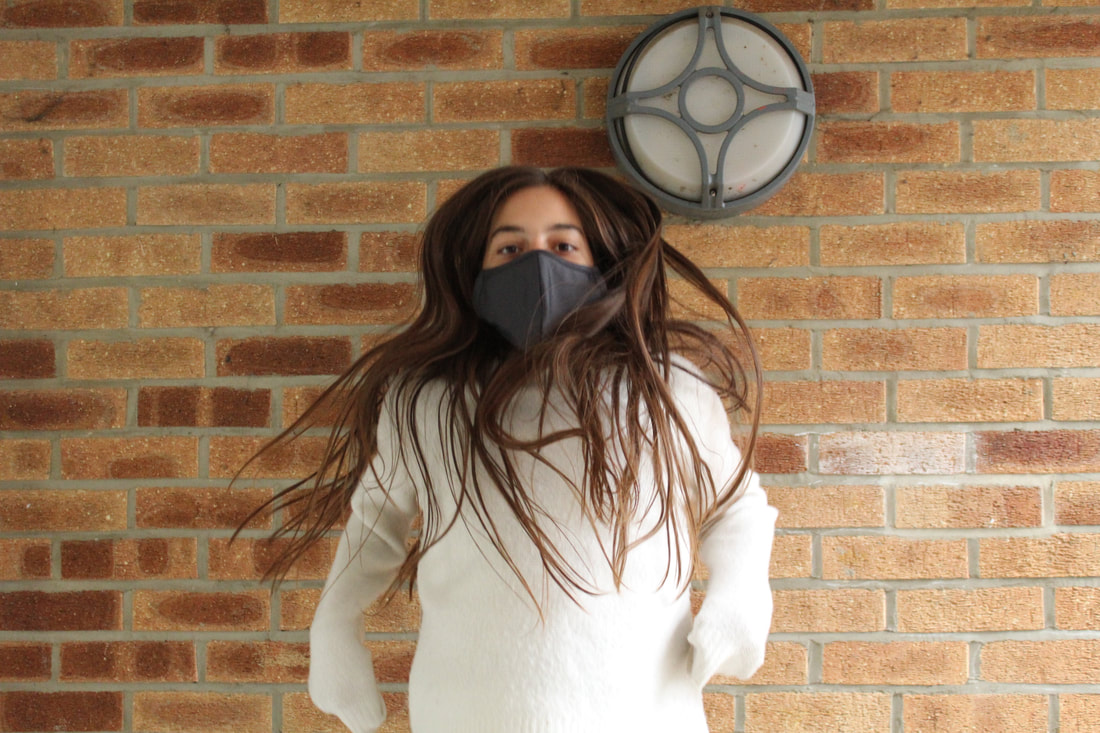
For this task, we were experimenting with shutter speed and capturing motion whilst the subject is in the air. this is called 'levitation photography' and is practiced by photographers such as Natsumi Hayashi.
On my first attempt, I had adjusted some settings to raise the shutter speed whilst keeping good exposure, so that the image would not be too dark. This worked, but the high ISO caused a low resolution and low quality image, so I had to adjust more settings. I gradually adjusted them so that the image wasn't too underexposed. I also changed the stances and angles to see if that would change anything. In the end, the ISO I was using was 12800, and this was because the room was quite dark and I was using a fast shutter speed, which shortens the length of exposure. I was using a varying shutter speed of 800 - 1000. This allowed me to capture the motion well and clearly at the cost of image underexposure. I would recommend shooting in a bright area, so you won't need to raise your ISO so high that it alters the quality of the image. I would also recommend taking the photo whilst the person is travelling upwards rather than down, as this keeps all looseness intact and they have less speed as they rise. To improve, I would've shot my photos earlier and outside.
On my first attempt, I had adjusted some settings to raise the shutter speed whilst keeping good exposure, so that the image would not be too dark. This worked, but the high ISO caused a low resolution and low quality image, so I had to adjust more settings. I gradually adjusted them so that the image wasn't too underexposed. I also changed the stances and angles to see if that would change anything. In the end, the ISO I was using was 12800, and this was because the room was quite dark and I was using a fast shutter speed, which shortens the length of exposure. I was using a varying shutter speed of 800 - 1000. This allowed me to capture the motion well and clearly at the cost of image underexposure. I would recommend shooting in a bright area, so you won't need to raise your ISO so high that it alters the quality of the image. I would also recommend taking the photo whilst the person is travelling upwards rather than down, as this keeps all looseness intact and they have less speed as they rise. To improve, I would've shot my photos earlier and outside.
|
|

|

Francesca Woodman


|
Woodman was an American photographer well known for using a slow shutter speed, unlike Natsumi Hayashi. This would create a distorted looking 'ghost' effect, and the images would then be rendered in black and white to give it a darker tone. While she took her photos, she asked the subject to move about, normally obscuring their face, whilst their surroundings stayed still. this would produce eerie and surreal photos that express emotion.
Province, Rhode Island
Francesca Woodman intended to create a ghostly apparition of the human body, captured in a surreal environment. She did this by making the subject have a blurred body, with the shoes remaining in focus, this gives the photo a creepy aesthetic. she wanted us to react to the photo thinking that this is an unnatural and image that is beheld by some force. Woodman is considering uncanny feelings and emotions in this piece of work. This is shown by the inhuman and unique movement of the body depicted. She wanted to explore the unspoken qualities of what we are capable of creating with a camera. Woodman used a slow shutter speed, and a black and white colour scheme. This helped her create the effect of unfamiliar scenarios, with strange motion and exaggerated emotion. This helps her support her intention of spreading awareness about unseen issues such as gender, corruption and representation of the body. |


|


|

These are my responses to Francesca Woodman. I have taken these with a slow shutter speed (1") and I have also edited them to further imitate Woodman's style. These images capture unnatural movement of the human body and emotion. To improve on these I would've taken them with a tripod, as it would better stabilise the camera. This is required as in these photos there is a lot of camera shake, this is due to not being able to hold the camera completely still whilst the shutter is open. Camera shake leads to the whole photo being blurry, including the background, which in this case is unintentional. Woodman also uses eerie or plain backgrounds, which I have attempted to do.
Composition
The word composition means to 'put together', people compose all the time. Some examples include art, photography, music and writing. In photography, composition is how you arrange the objects in your photo.


Aperture
Aperture (or F-Stop) is the opening in the lens attached to the camera where light enters. It is measured in whats called an f-stop. A large f-number means that the opening is very small, and does not let much light through. A small f-number means that the opening is large, and more light is let through. Depth of field is the distance between the closest and farthest objects in a photo.

The first photo was taken with a high f - stop (e.g 1.8), and the second was taken with a lower f - stop (e.g 22). This changed the depth of field as the first photo has a deeper DoF, and the second has a shallower DoF. it also changed the amount of light being let into the lens, so other setting such as ISO or shutter speed would've been adjusted.
Rule of Thirds
The rule of thirds is used by most photographer and helps makes photos more interesting in terms of composition. You would divide the photograph using the lines and place subjects onto the lines, or even better, the intersections. The photos below are my attempts at using the rule of thirds.